
Development Dive - Unwound's Custom Camera Controller
An in-depth look into the custom camera controller I built for Unwound, an upcoming third person RPG platformer by Wirescribe Games

This article is a Development Dive, and kicks off a new series of articles that I'll be writing which focus on different game systems I've worked on in the past. I've received permission from each studio to release this information. If you're interested in seeing more articles like this, consider subscribing and sharing these articles. They will remain a free and public resource until the end of time.
A big thanks as well to the team at Wirescribe for allowing me to release this article.

What is Unwound?
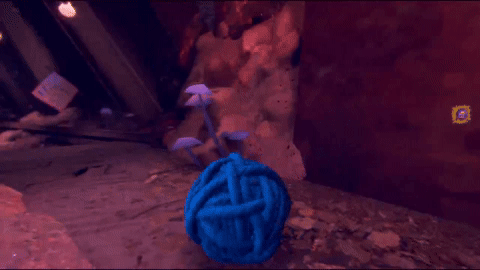
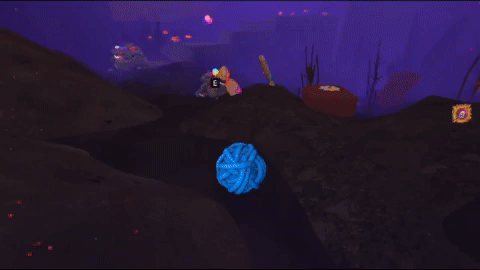
Before we dive in I'd like to chat a bit about Unwound. It's a six to eight hour 3D narrative RPG which combines gameplay elements of OMORI and Psychonauts 2. The game is set in a surreal, fantastical world where people are objects, and candy is the most valuable resource there is. You plan as an investigator sent to find the cause of a series of natural disasters affecting Candy Island.
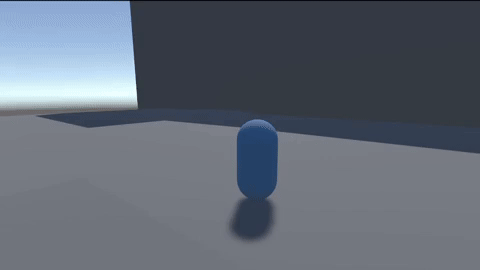
When a storm destroys your ship and strands you on the island, you must use found objects to build yourself up from a sentient ball of yarn, with new body parts changing how you navigate this strange and mysterious place. Get involved in politics, join cults, uncover lost memories, make friends and break hearts — but figure out what's causing Candy Island's troubles before the whole place breaks apart.
What are we looking at today?
Throughout this article I'll be writing about the process of developing and designing the camera controller rig in Unwound. I'll be touching on the challenges both myself and the team faced, and how I fixed them throughout the course of the camera's development. These come from spaces of design, development, and usability cases for the camera.
The Story of the Camera...
Work on the new camera system began when I was brought on to the project. I joined quite late into the development of the vertical slice. The rest of the team had made significant progress on the level design, visual polish, and narrative design, but both the camera and the player controller were incredibly difficult to control. This was recognized by the team as something which needed immediate attention, and they were spread too thin to properly address it. So, after I was brought on, I took ownership of the camera system and the player controller (maybe we'll see another article about the player controller in the future).
Over the course of the prototype's development, and after a great deal of testing, I refined the camera controller from quite an early prototype all the way to what the team considered a shippable camera. Just this past weekend we play-tested it publicly at PAX East, and were elated with the results.

I’ll be writing this article as sequentially as I can, starting from the beginning of the camera’s development and touching upon a series of challenges we faced along the way. I’ve limited these challenges to creative, design, and dev-tool usability. I will not be discussing bugs or technical issues.
Why Cinemachine wasn't working
At the beginning of this process when I had joined, the logic of the camera was run entirely off of Cinemachine. Cinemachine is Unity's proprietary camera control package, which is designed to mimic and operate more closely to camera systems found in 3D software, such as Blender or Maya, but also holds an intensive amount of logic to build robust and extensive dynamic game cameras.
While the current camera was functional, the aspects we cared about were too difficult to properly manipulate on their own. There is definitely another timeline where the team continued with Cinemachine, but when it came down to brass tax we wanted a firm hand on the behaviour which the camera exhibited.
Third person platformers are notoriously one of the most difficult genres to develop for. We desperately needed a camera which could handle unorthodox behaviours and states, without having to jump through extensive hoops. Effectively this meant Cinemachine was simply too complex to tune accurately within our time limit. There was a significant overhead of behaviour and functionality that we simply did not need. Simply because all these levers and knobs existed, we found it incredibly difficult to get it right.
All of that to be said, Cinemachine is an incredibly powerful tool, we simply wanted our own set of levers for a more 'firm grasp' of the system. I am confident that we could have used Cinemachine to get where we wanted to, it simply wasn't the right tool in this immediate case.
What the Camera needed to do
Through an incredibly high amount of internal testing and a constant stream of communication between myself and the team, we came up with a set of rules which the camera had to operate by. Some of these came about in the midst of development, but others were long standing from the very beginning.
Our Camera had to be...
Easy for the player to control
Players should be able to intuitively understand how to use the camera just by toying with it
It should mimic behaviours of other similar game cameras to draw on player's understanding
Responsive to inputs
If an input is made, the camera should always move within its constraints
The camera should *do what the player wants it to*
Just as good on keyboard & mouse as well as gamepad
We are targeting both PC and consoles
It had to feel good on both peripheral types
Comfortable and feel good to control, no matter the space
Unwound features tight corridors and wide open spaces
Being able to see everything you need to, no matter the space, is vital
Accessible at any point to be manipulated manually by developers
It had to be able to respond to events triggered in-game
There are use cases in which the camera had to be manipulated in incredibly weird & specific ways
Inspirations & Studies
I would argue that this camera system is effectively a love letter to the cameras of Stray, Psychonauts, and many more. Much of my time creating this camera was exploring cameras of other games in-depth, and then discovering out own design challenges and solutions. The process typically saw me spending some time getting familiar with the camera of one game, noting how it handles different cases in play, reasoning out why it would, and then determining from that challenges the designers faced in their own systems.

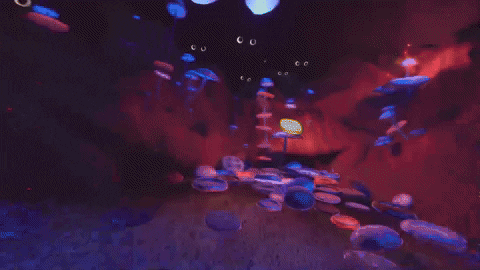
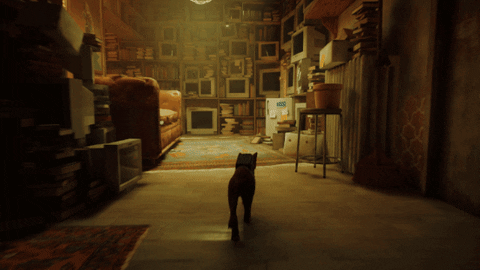
For Stray we found that a consistent close-follow behaviour was present throughout the game. There are many sections in which the camera moves more rapidly or specifically towards a new target, but for the most part you are closely focus on the player character.
This made sense as not only is the cat an incredible selling point for the game, which players would want to see up close, but the environment of stray is tight and claustrophobic. Players are consistently moving through spaces that a normal person (or cat) would rarely be comfortable in. Keeping the camera close and tight was crucial both from the perspectives of marketing and gameplay here.
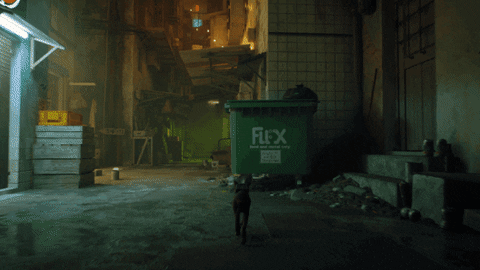
What Stray did remarkably well was object avoidance. The camera rarely clips through an object or has a 'flicker' on the screen from one passing. Different objects are marked with different qualities as to whether or not they should be avoided, and when the camera moves in close to the player it spends a few seconds waiting before dolly-ing back out.
These behaviours were definitely something we wanted for our camera, as our player was consistently in tight and snug areas with many obstacles. Compared to other games I looked at, the camera movement in Stray was quite smooth when avoiding objects. Though we did find some points at which the camera would have to quickly snap forwards.
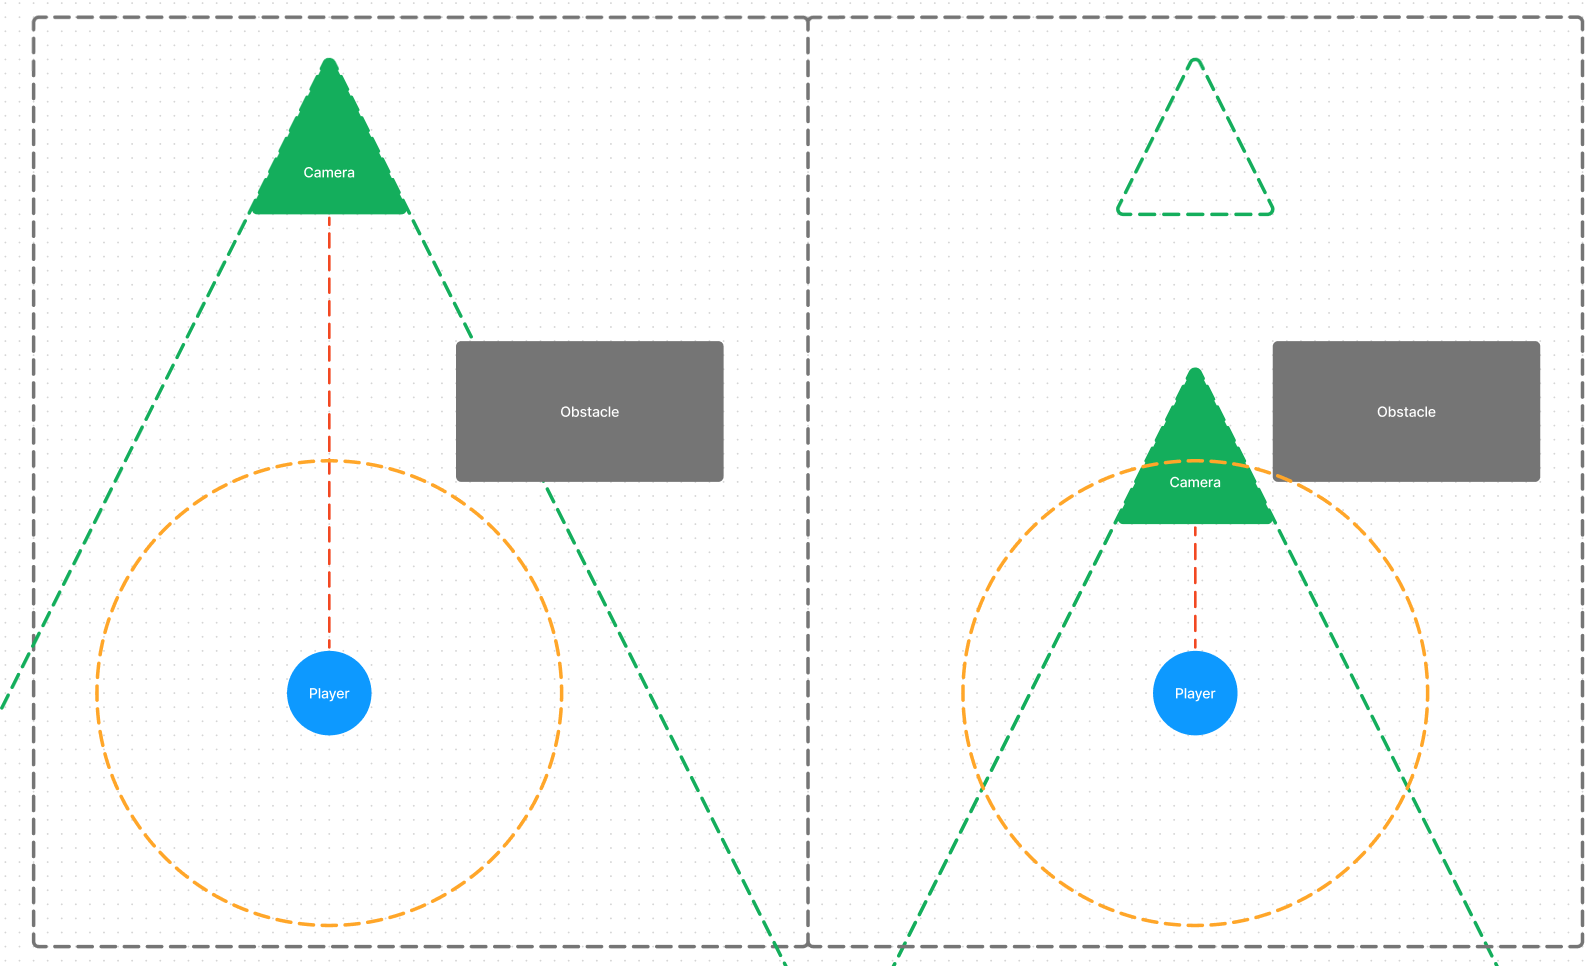
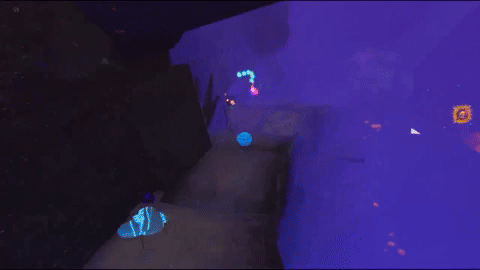
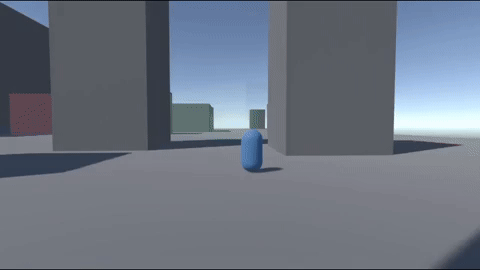
Object Avoidance
In Stray, when an object is in between the player character and the camera, the camera snaps forward in an instant to avoid colliding with that object. This is almost always mitigated by level design, and by ensuring that smaller objects in the view of the camera do not cause avoidance. In some cases snapping forward in an instant is the only option that the camera has, but in others it feels a bit abrupt and intense.
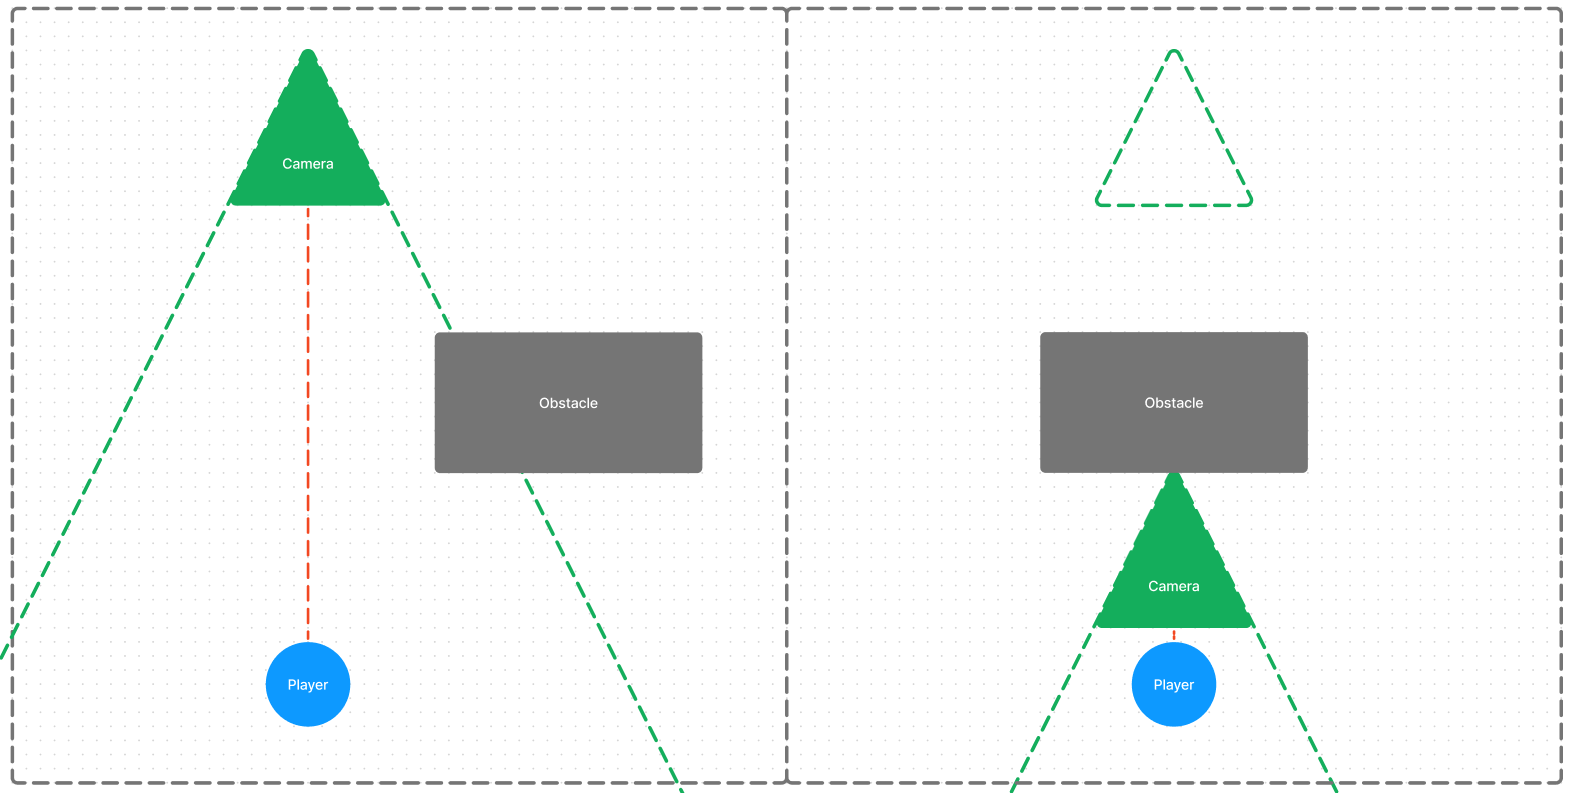
The diagram above displays this interaction from left to right. In the left diagram we see the camera pointing a raycast to the player, but on the left we see where it snaps in an instant to maintain vision when the player walks behind an obstacle.
To solve this I spent a great deal of time considering alternatives - could we have the camera move around objects? I had made a quick and dirty prototype to see how this would feel, and after some awkward testing, this ended up feeling absolutely terrible. Having the camera move on any local axis other than the Z axis felt as if the player was moving, or that the environment was trying to tell us something. Players who had this feature would make audible sounds of confusion when this happened.

After this I attempted a few more weird hacks. My first idea was to create a "safe orbit" for the player camera, which would be determined by the closest point in a sphere around the player controller. This was a rousing success in preventing object avoidance, as it always brought the camera in towards the player depending on the closest object that it could possibly overlap with. The only problem was... it felt terrible. If the player stood next to a wall or walked down an uneven hallway the camera would move in and out awkwardly. So I threw this idea out.
After much testing and ideation I decided to apply Occam's Razor. What if I performed a spherecast around the camera's intended position, and if there was an object colliding, lerp the camera forward or backward? Through a great deal of tuning and a series of rapid iterations, this proved to be the most robust solution.

This solution turned out to work the best. Though, there were still some holes in the logic. Lerping the camera to its intended target position meant that it would lerp through objects. While this was only noticeable in some cases, it was incredibly unpolished. To solve this, I added in cases in which the camera should check how far forward something is: If it's directly in front, immediately jump forward and do not lerp. If the distance between us and the obstacle is coverable fast enough through a lerp, then lerp forward to keep a smooth motion.

This took quite some time, but it improved drastically on the methodology we had seen in other games. This eliminated the jumps forward for the majority of geometry. The camera on Unwound now smoothly glides around obstacles, and only snaps into position when it absolutely has to.
Wide-Follows
After looking at Stray I turned my attention to another narrative-focused platformer: Psychonauts 2.

In many ways, Psychonauts 2 was an opposing reference to Stray. Here the player is almost always in vast rooms or outdoor spaces, jumping around a map doing platforming challenges or combatting enemies. The dynamism of the camera in Psychonauts 2 emerges when dialogue begins. As I explored how their camera worked, I made some meaningful discoveries.
When moving through a large space in Psychonauts 2 the behaviour of the camera varies based upon a great deal of factors. The majority of these conditions had to do with the level design, state of play, and the current emotional tone of the game.
For example, in environments which are calm, like the game's main hub the camera comfortably tracks the player, following them through the space with minimal lag time. It's responsive, but not snappy. You can feel it smoothly glide about as the player navigates the space.
Similar behaviour can be exhibited when in a non-combat unfamiliar environment. Here the camera follows the player at a much farther distance, and adheres to movements in far more grand ways. When moving through a forest it's easy to swing the camera around from a far distance. You can more easily observe the space you're in, but it doesn't feel chaotic.
While in bossfights I also noticed that the camera felt far snappier, but the sensitivity and speed were not modified. It appears that the sensitivity of the camera remains the same, but its motion to its desired position is sped up. This makes the camera feel snappier and lighter while in a bossfight, and floatier while exploring.
Outside of peaceful areas, I noticed three behavioural patterns which interested me. In some combat environments where the player had a more personal engagement with a single enemy or a boss, the camera maintains a tight and immediate lock with the player character, while tracking and maintaining any necessary environmental elements.
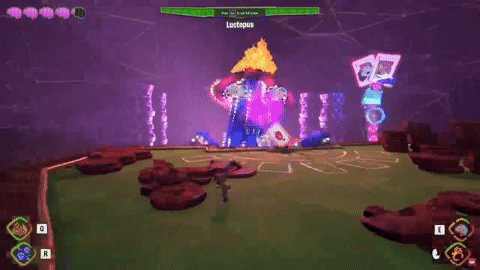
The other pattern was a broad combat-space view, in which the view widens out and we can see far more of our environment. The camera itself moves as far back as it can, and the environments are designed for it. In the GIF above you’ll notice that the combat arena has no immediate walls around it. This is true of many other bossfights in the game as well.
And lastly, was a more intense combat follow mode. This mode is typically seen in indoor combat spaces, and feels most comfortable when fighting small groups of enemies. One can easily manipulate it to see their targets quickly.
Dialogue Mode
While the larger area cameras of Psychonauts 2 were influential in how we handled our larger spaces, there was a lot more attention in how dialogue interactions were handled. Unwound features a set of characters that you speak to, all of which are at the same scale and level as the main character.
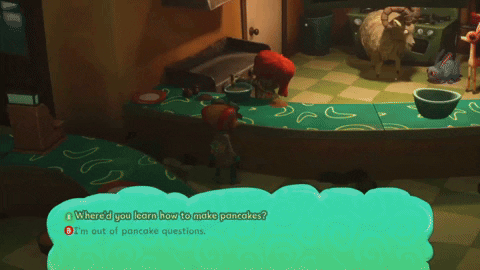
Upon interaction the camera in Psychonauts 2 snaps to position in dialogue, we felt that this was a bit of a drastic change, and wanted to keep the player in the environment as they were chatting. In the GIF above you can tell that it is quite cinematic, with close ups of characters quickly being focused with highly scripted interactions. This is accompanied beautifully by the wonderfully crafted facial animations of characters in the space.
While the majority of Unwound's character aren't nearly as animated, but we wanted to make sure the player got a good look at them in the space. In the old camera system, the control of the player's camera would lock, then it would move into place. We knew going into this we would need a comfortable way to enter and exit dialogue throughout the game, and get rid of the static camera placement.
One of the main challenges here is that it had to be reliable. We couldn't just have the camera move randomly through the space and land nearby the NPC. I also did an extensive study into how Fallout 4 handles its NPC interactions, as it too has a series of characters it needs to display with procedural camera placement.
Fallout 4 does some quick calculations to determine the position of the camera. It checks positions between the player and the target NPC and calculates possible positions to the left and right of the conversation. From here the camera determines whether or not it can see the player or the NPC in each of these positions, and then plays these back accordingly.
It then also chooses close up and far camera angles, and alternates between them depending on the emotional tone, environment, physical space, and characters.


It also mimics the motion of the bodies of characters, slowly moving as they move to keep the target centered on the screen. The intent behind this appears to create automatically cinematic moments with characters, and it does a pretty good job of framing every NPC for the context they’re put in.
When there are more than two characters in a conversation, it calculates two positions per character. It performs this to try and keep conversations contextually fluid. This means that if characters in a circle take turns talking, the system will first attempt to use the same camera for each NPC, but if three different actors talk to one another in order, it may have the camera transition to a new position. It also tries to maintain the same directional movement for cameras if it has to use a new angle, but this happens rarely.

Unwound doesn't need any of this, but it was cool to study how it worked.
I tested this briefly in a prototype, and found that while it was cool, our player character wasn't reading off voice lines. We have a mute protagonist, so when the camera turns to face them, they don't say anything. NPC text slowly scrawls on to the screen so it makes sense for us to watch them, but the player's dialogue choices happen immediately. We may revisit this idea in the future perhaps and test a slower delivery of the player's dialogue, but we moved away from it at this stage.
What we settled on was a simple combination of both the systems mentioned above. We dolly the camera in to a pre-determined point placed in the world by a designer, slowly rotate and focus the camera on the target NPC, and engage the dialogue. This provided a fast, smooth, and decently polished form of interactivity.
I also did some work to avoid the camera from being completely static. While you select dialogue options, the camera interprets either movement from the mouse or gamepad to give it a little bit of motion. This is a small bit of feedback that adds a tiny bit of flavor when you’re talking to someone.
Camera Profile System
In the process of developing the camera I decided to go with a stack and condition architecture rather than a state machine. Early on I had built the camera as a state machine with states representing things such as ‘moving to target position` or `avoiding obstacle` but this resulted in an incredibly high amount of states and resulting edge states. This got in the way of my 'firm grasp' philosophy, as I got to a point of assuming more than 40 individual states before I had realized it.
Not to mention that we were still adding new features and functionality to the camera, so every new state needed transitions to and from every other associated state.
As a result I took a step back and re-evaluated our needs. Rather than build an individual state for each logical moment of the camera, I decided to center it around a series of flags which could be used to determine behaviour. From there I built a stack of functions which ran every aspect of the camera individually. This allowed me to more comfortably construct logical states for the system without having to worry about entirely new edge-states that conflicted with one another.
Going forward if I were to work on this system again I would more than likely build multiple state machines in tandem, to compare different states of the camera rig to determine logical movements. For example the collision system, movement, rotation, and final camera would each have their own state machines, and camera behaviour would be based off of their combined status. I feel this would be a major improvement on the system, but given the time constraints I felt the stack & condition structure worked best.
It was from this architecture that I was able to quickly move our settings into scriptable objects. I named these Camera Profiles. From these designers could quickly and easily change how our cameras operated. The camera rig could take any Camera Profile and interpret them into the proper camera settings. During development and in-engine runtime these profiles could be applied whenever a value was changed in editor using Unity's OnValidate() function for live tuning. At runtime we used a series of different triggers to swap out the current camera profile.
The fastest and easiest way to swap camera profiles was to create Camera Profile Volumes. These were containers which automatically changed the Camera Rig's profile to a specific one on entry, exit, and stay if needed. Through these we were able to setup auto-changes in the space. This way when a player entered a small room, we could quickly change the profile to stick closer to the player. When they left, we would have it automatically swap to a wide-range profile.
In the GIF below, when the player moves towards a large cliff-side, the camera changes to an ultra-wide follow profile. We never used this huge camera rig in the final game, I just made this for fun to demo the system.
Camera Profiles contained all the information we need for how our cameras behave. How quickly do they lerp? Do they lerp? How closely do they follow the player? What kind of object avoidance do they utilize? All of this, and more, is stored on each individual profile.

Spline Camera
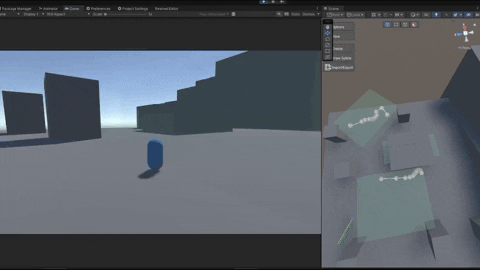
There were many other specific use cases that the camera had to tackle, one of the most prevalent was to put the camera on a track and follow the player along it. This is only used in a few spaces of the game, but in those spaces it can be quite important. In order to keep the camera on a track I built a system using our spline solution which had the camera move and stick to the nearest point on a spline whenever a Camera Profile Volume requested it. From there I found the point on the spline which was, on average, closest to the player's position, and had the camera focus on the player while it moved along the spline. Aspects of spline move speed, camera focus and rotation speed, and how quickly it moved on to the spline are all handled in an individual Camera Profile associated with that spline path.
Below is a rough prototype of the spline functionality showcasing both how the camera zones work with them, and how they move along their paths. We quickly modified how the cameras get to the splines to get rid of that awkward motion.
Earthquakes
Another use case I had to consider was that the camera had to have earthquake shake effects built into it which could be triggered by anything else in the project. Earthquakes happen throughout Unwound in varying degrees of intensity. We needed a quick and easy solution to animate them.
To do this I built another scriptable object called Earthquake Profiles. These profiles had a series of curves representing power, motion, and scale for each axis. They allow a designer to manipulate and jostle the camera using animation curves.
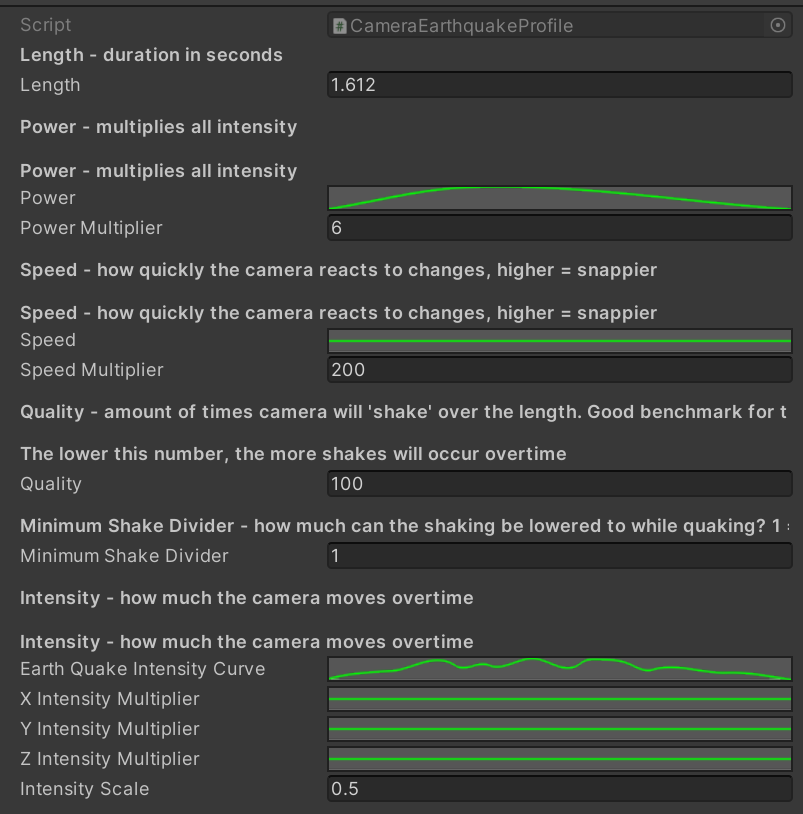
When an earthquake needs to happen, another object in the world calls a public function on the camera, which requests an earthquake profile. This proved to be the quickest and easiest method to apply specific earthquakes, no matter the situation.
Z-Track & Contextual Dolly-Back
Earlier I discussed how I solved our issue of object avoidance, but there was one more piece to the puzzle. When the camera moved in closer to the player character, it would immediately move backwards towards the furthest wall it could find. This behaviour resulted in the camera comfortably sliding along objects both forward and backward. While this would have been good for an action game, we felt that it was a bit jarring to have the camera immediately move as far back as it possibly could, whenever it could.
Below is some earlier prototype footage of the camera rig always attempting to maintain the furthest possible distance from the camera. The camera would consistently push back against the environment, making it feel awkward to control. In some cases this resulted in object-avoidance failure.
To solve this, I experimented with a few different behavioral ideas. At first I tested how it felt to have the camera immediately begin moving backwards, but far more slowly. Instead of sticking to the furthest wall no matter what, how did it feel for it to glide backwards? Well, in short it felt bad. After that I tried to swap between lerp, smoothed, and snapped (internally we called this one "hard") movement. These also didn't solve the problems, and instead we found non-lerped movements made jitters and pops that we wanted to avoid. After all, one of the core pillars of this camera system was comfortability.
This kind of movement felt uncomfortable and disorienting. The camera would constantly either be moving forward and backward on its local Z axis. I named this the Z-Track on the camera rig to keep our terminology more memorable. The Z-Track always had a length which could be accessed to find it's end, so that we could consistently check how far back the camera could move.
To keep iterating I threw out the always-moving prototype and tested out a different idea. What if the camera only moved back if there was nothing blocking its Z-Track? This test ultimately resulted in a step forward, but it wasn't there yet. It still faced a core issue of not moving back while in small spaces.
It was once I hit this point that I began to look at my references again... was I missing something? Did we not see something happening in other games? Does this just happen in other camera systems and we weren't noticing it?
It turns out that every game we referenced has a different solution for this problem. Psychonauts 2 has the camera move forward and backward as much as it can, consistently maintaining the maximum distance from the character. The main reason I hadn't noticed this is that the majority of the levels where this behaviour can easily be seen have far-following cameras. These areas are large, and one becomes used to the camera sitting as far as it can.
Stray solved this issue in a different way. When you move the camera in by having it brush up against a wall, the camera will always hang at that distance until there is space for it to move back. Once space is confirmed, it waits roughly 2 to 3 seconds, and then slowly drifts back as far as it can. This behaviour was half of the key to solving our problem.
I implemented this delayed-dolly immediately and the effects were prevalent. It felt far more comfortable and polished to move through spaces. Having the camera always wait a bit, and then proceed to move back as far as it could made it feel incredibly polished and comfortable to use.
There was one case though which I felt I had to deviate. Stray always waits before dolly-ing backwards on the Z-Track, but in many cases in Unwound I wanted the camera to quickly return to its maximum Z-Track position. This was mainly when the player left a small tunnel to emerge to a large open space, or when the camera got too close in a wide-open environment.
Before I decided to change anything I wanted to challenge myself to work within the constraints of the system I had built so far. After testing different wait times dolly-back speeds, and Z-Track maximum distances, I had come to the conclusion that this was a behavioral issue and not a tuning issue.
So I added one more logical clause: If the camera is not sitting at its maximum Z-Track distance, and there is nothing blocking the Z-Track, have the camera immediately dolly-back to its maximum Z-Track position.
And voila! There it was. I could tell immediately after the first prototype that this was the secret sauce our camera was missing. It was now responsive and smooth, while still being snappy and controllable. One of our rules for the camera was "It should do what the player wants it to." And I quickly found myself automatically thinking "I want to get a better view of this space..." instinctually rotating the camera to get a better view, and immediately having it dolly backwards.
It definitely needed a bit of tuning before I called it complete. This really only amounted to a different dolly-back speed for wait-then-dolly and instant-then-dolly movements. It felt bad when the camera slowly petered backwards in a large space, but it felt worse to have it swoop backwards in a small space.
By the end of this, the camera was reliably dolly-ing forwards and backwards based on the environment it was currently in. This is by far one of the most important elements of the camera rig.
Looking Up
In early versions of the camera we found that there was a behaviour which we had not considered too much in design: Looking up. Players would consistently try to look up towards the sky in our environments, only to find that the camera awkwardly slip along the ground until it was right underneath the player.
We initially thought "Oh, that's easy. Just make the player transparent when they get close." This way the camera's rotation would naturally match that of the player's input, and we could solve this problem in 20 minutes.
Boy were we wrong.
When I tested this in practice players would rarely be able to focus the camera on what they wanted to. Referencing another of our rules, we wanted this camera to be accessible and easy to control. Specifically, we wanted to ensure players could always look at whatever they wanted to. This meant I had to extensively take into consideration what it meant to look up in Unwound.
When I performed a bit more research into other games, my findings were more inconclusive than I would have liked them to be. Many levels in Psychonauts 2 did require you to look up, but you could almost always find what you were looking for without getting the camera all the way into the player character's body. Stray simply made their character transparent and lowered the sensitivity when they got close, but again, this would only partially solve our problem, as this methodology worked to help the accuracy of the camera but only when one was looking up less than 45 degrees. Anything more than 60, and it began to feel relatively awkward to control.
I began to look at other third person games which featured moments of "I want to look at that..." and began conducting some more research. I began with Star Wars Jedi: Survivor, and found that they implemented a visor mode so that the player could scope out the environment through a first person camera.
At that moment I thought - why don't I just build that?
Over the next hour or so I rigged up a quick prototype in which, when the camera god close enough to the player, it swapped into a first person view from the center of the player's body. This was definitely closer to what I wanted, but it didn't fully hit the nail on the head. It also felt incredibly awkward to swap the stick from a third-person axis control to a first person control automatically, so I left it inverted no matter how close you were looking.
After some more testing I added in a few more elements. First I had the camera rise above the player as it got closer to mitigate the clipping effect. The player still becomes transparent when the camera nears, but the effect is far less intense when the camera is above it.
On top of this, I added in an additional rotation to the X axis to help the camera look up even more when the player wanted it to. I made sure this was controlled by an animation curve in the assigned Camera Profile, just in case we wanted to adjust it in differently sized spaces.
After an extensive amount of pushing, pulling, and tapping our our levers, I was successfully able to strike a comfortable balance. It was now incredibly easy to look up at anything in the space one needed to.
This system is not perfect, though. It can be cumbersome to manipulate the camera into place in small environments. In many cases of small-space environments the camera would automatically begin to look up if the player was pressed against a wall. I had to add in logic that basically told the camera to only look up if the player wanted to, not just if the camera was close.
I do think this auto-first person mode could use some more love in the future. I'd love to experiment with it more and find a more common balance between when the camera moves to first person, or maybe an entirely different solution that makes it unnecessary.
Multi-platform Readiness
Unwound plans to release on both PC and consoles, so I had to spend time ensuring that all of these systems felt good on all peripherals. While I initially thought that they could functionally be treated the same, I had to take into account a series of classic modifications every camera programmer has faced.
The first and foremost obvious one was scale of peripheral input. Keyboard input was to a different scale than our stick, so I quickly tuned that. I then found that the movement ratio for input on the mouse was different than that of a controller.
For those unfamiliar, in the majority of games featuring dynamic cameras, most will have their X-Axis sensitivity scaled higher than their Y-Axis input on a ratio of about 16:9. This is due to the conventional size of modern monitors and TVs. For Unwound I immediately felt that the 16:9 ratio we were using for the mouse was incredibly awkward on controller. I couldn't necessarily put my finger on why, but it felt like they were too even. I was constantly moving the camera up or down by accident when I really just wanted to move it horizontally.
I was able to move up and down at what felt like the same speed as left and right. After a lot of testing I ended up bumping this up to a 21:9 ratio. Once I did it was far easier to swing the camera around to explore and view a space, and I wasn't accidentally looking up or down. I chalked this up to how much easier it is to move a stick both vertically and horizontally at the same time, which would easily cause those unwanted vertical movements.
None of this was too difficult, as we were using the ReWired controller package in our project for our input handling. I was able to adjust the scale from there, and then we were able to ensure that they properly linked into our camera sensitivity settings for user end modification. Going forward I would like to move the project over to the new Unity input system. Eventually we may, seeing as the new input system did not exist when work on the project began.
In Conclusion…
These are just a handful of the design challenges I faced when building the camera controller for Unwound. I hope this helps to inspire your own future work, and serves as a resource for the design challenges you face in your games.
If you find yourself boxed in a corner I highly recommend finding similar titles and studying the rules of their cameras. It was incredibly insightful, both so that I can discover what I should be doing, and what I should not be doing.
Before you start working outline the needs of your camera system, and continue to add to that list as you go. I don’t consider my list of rules complete yet. Outlining your design challenges helps you to solve problems through analysis and ideation.
Each of the problems I faced along the way was solved by analysis and experimentation. The more you iterate and test your work, the more you’ll recognize what’s wrong and fix it.
I hope that this serves as an example of how a complex system can be built out of research, testing, iteration, and development for each feature, one at a time.
Thank you for reading. If you enjoyed this feel free to drop a like or comment, it’s how I know you’d like more.
P.S. I’ve received permission from Wirescribe to release the code of this camera for free under a Creative Commons License. In the future I may do so!