

Forced Constraint Artwork in Godwalker
Forced Constraint Artwork in Godwalker
How does one build a digital art style to look like a 'refined' old style? And more importantly, how do you make it into a production pipeline?

Introduction
In this article I aim to cover the specific elements of the forced constraint art style I’m working with. I’ll specifically try to touch on which constraints are being presented, rules of material and texture design, lighting and rendering goals, and environmental composition.
Requirements
As a solo developer I needed to find an art style that was producible by myself alone, but also polished enough that it could be presented as commercially viable. In other attempts I’ve tried to build procedural textures and shaders, which resulted in less visually polished environments and assets. At the time those procedural art elements were serviceable, but not polished enough for me to consider them refined.
Taking a step back, I tested out several methods of full scale art production pipelines. I began by building assets through every step: Concept art on paper or in Photoshop, 3D modeling and UV mapping in Blender, texture painting and high poly baking in Substance Painter, and then importing into Unity.
Overall this process was something I could successfully perform with quality, but it took far too long to execute. Building an asset took me about 30 minutes each, which meant the construction of environments took far too long. I decided to focus on the specifics of what aspects I could optimize.
After a lot of exploration I’ve minimized the 3D Modeling and UV Texturing aspects by relying on ProBuilder’s world space UV mapping. Using this, all textures can function as world space materials, which allows me to build spaces and texture them as objects. To cut down on texture production, I decided to move to a PBR workflow using royalty free images to build low resolution textures. In order to generate normal maps I import the PBR surface texture into Photoshop and render out a color space normal.
Using all of these methodologies I was able to cut down the modeling and UV stages down, replaced the procedural texturing stage with a PBR workflow to speed up production, and replaced the high poly baking stage with a generative texture in Photoshop. All of these optimizations have resulted in a more efficient production process, allowing me to prototype and dress high detail environments extremely quickly.
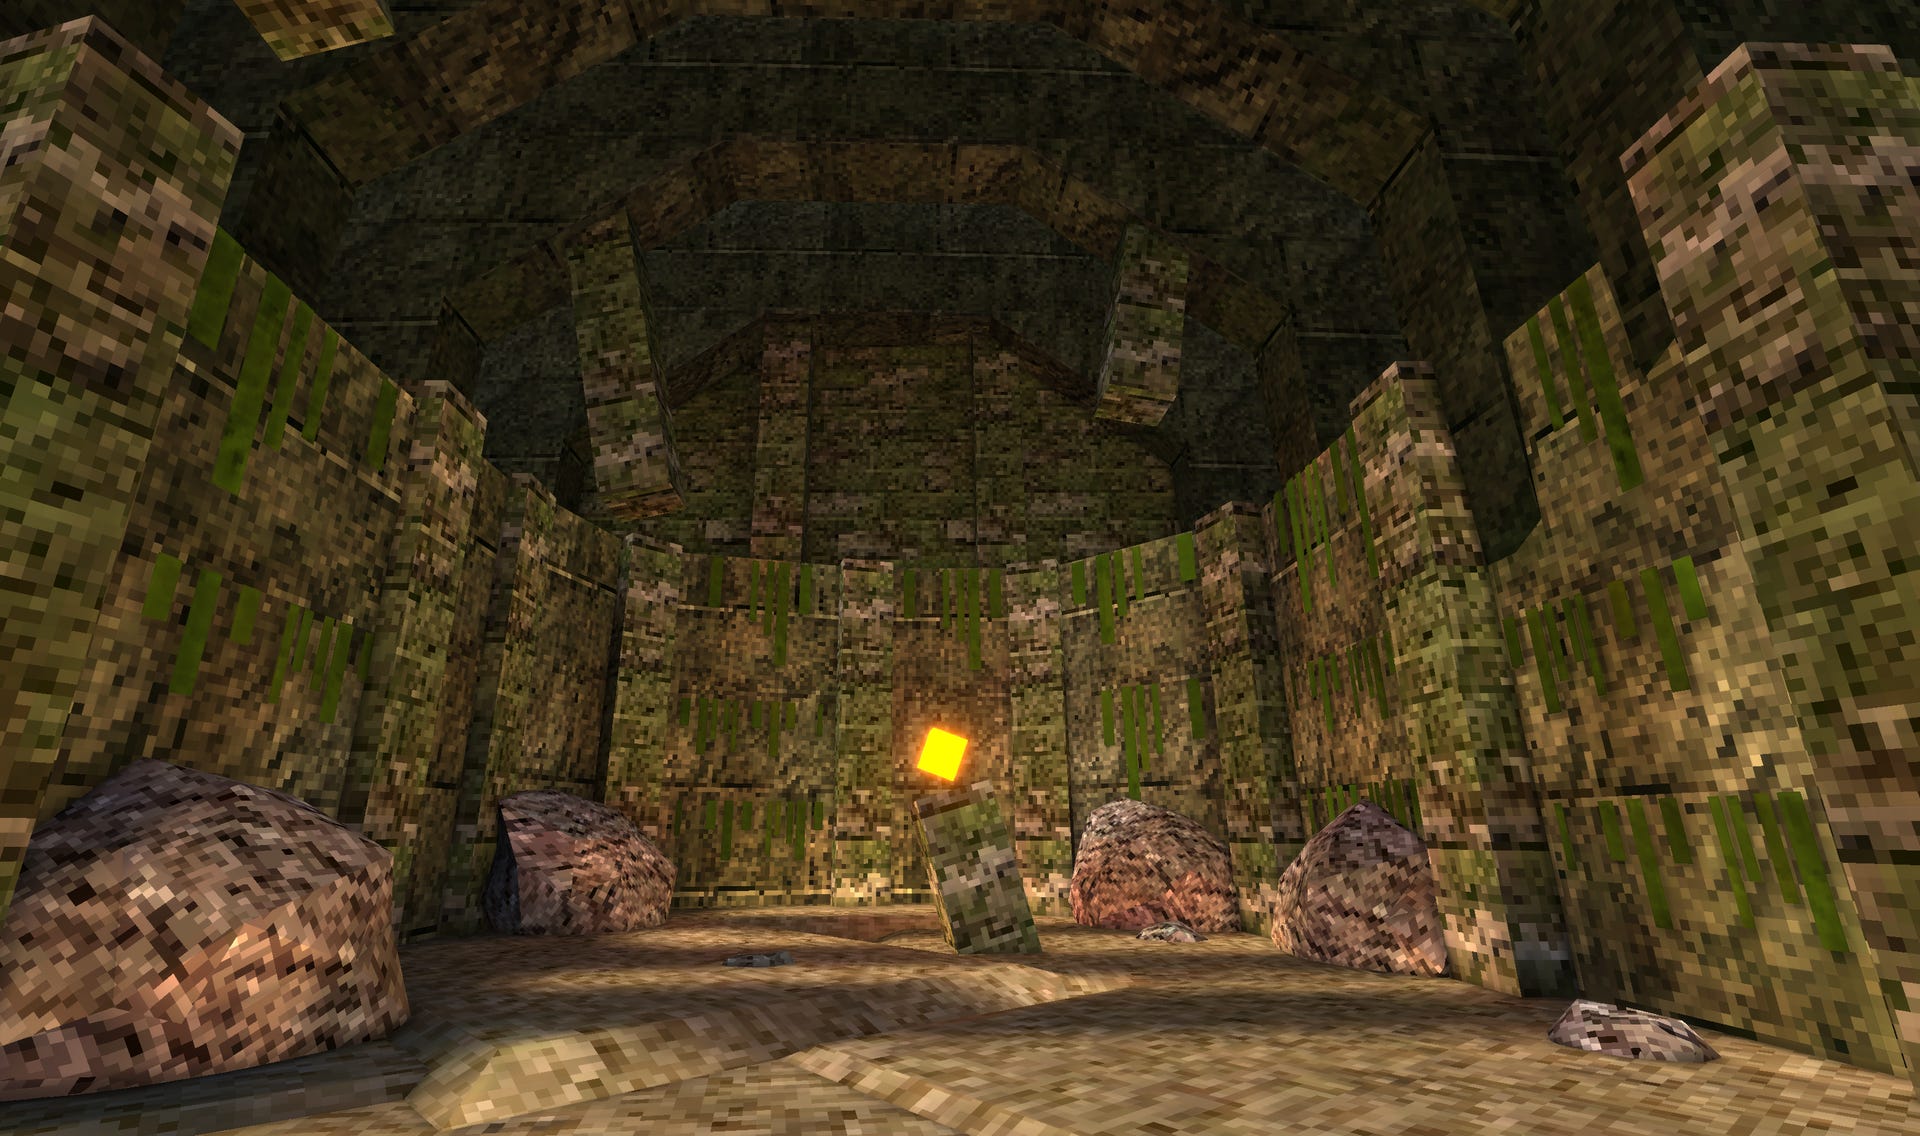
Below is an example of a test environment built and textured using the methodologies described above. Throughout this page I’ll go into detail on the specifics of what constraints are put into place, methodologies for building consistently readable environments, and how lighting and rendering play a role in the environment’s composition.
Constraints
Low Resolution Unfiltered Textures
The first and foremost prevalent element of this art style is the usage of very low resolution textures. By doing so I can achieve a visual style reminiscent of old Doomer Shooter games, which is the feel and vibe I am attempting to emulate through gameplay. To make these low resolution textures I pull a royalty free photo from online, downscale it, make it into a repeating texture, and then import it into Unity.
One of the most important key elements of these textures is the utilization of a consistent scale. Each texture is a 128x128 repeatable texture image which is then downscaled in Unity to a 64x64 texture. Rather than simply make a 64x64 texture to begin with, allowing Unity to auto-downgrade them gives the textures a machined and processed look that is difficulty to achieve in Photoshop. It also allows for unwanted seams to be covered up at the 128x128 scale in less-than-perfect ways, because they will be downgraded.
All of these textures are unfiltered photo based renders, which means I am downsizing and cropping images into a 128x128 block. I then make that block repeatable, and then import it into Unity to downsize it. If these blocks are filtered bilinearly they lose their intense pixelation.
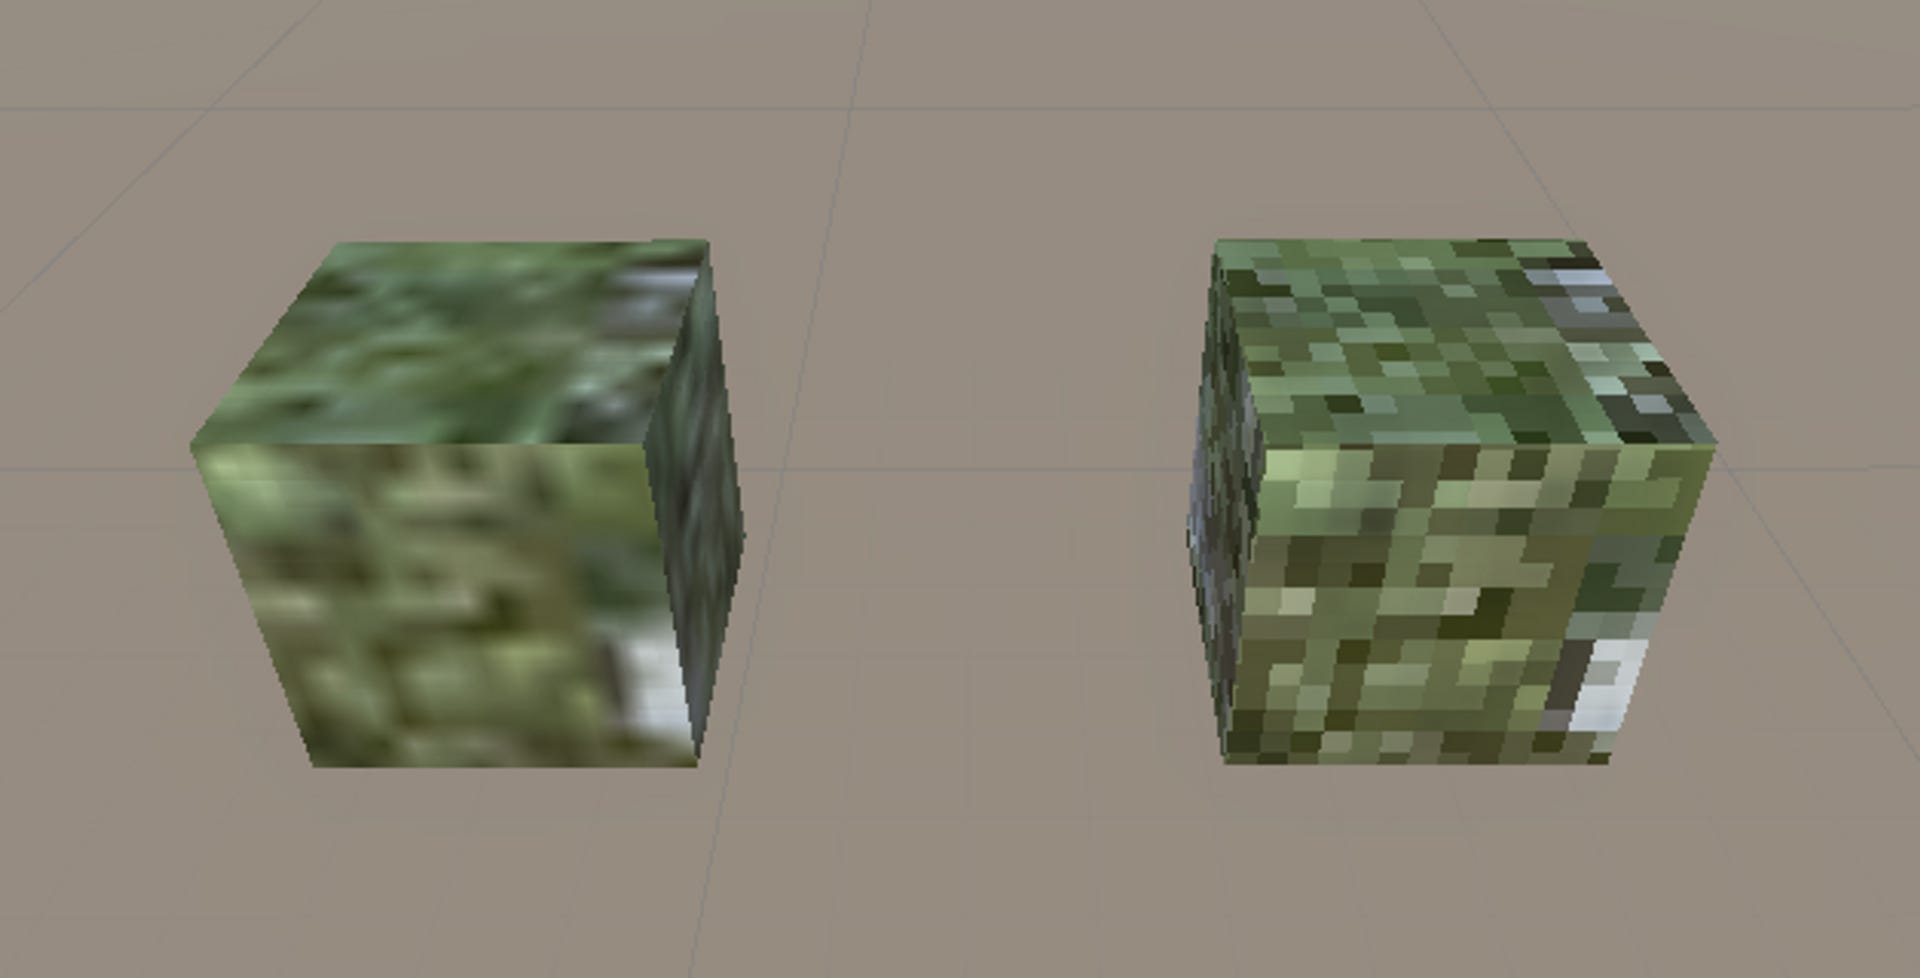
This is an example in which the same material is presented in both a filtered (left) and an unfiltered (right) state. As you can see, the filtering makes the texture look washed out and it loses its detail. Maintaining a consistent level of detail and unfiltered specificity will be key to building a designed environment.
Low Resolution Detail Maps
By crunching these PBR textures I’m able to utilize their colors and aspects extremely quickly. The elements of PBR include facets surrounding environmental details and mappings. In this case building things such as normal and height maps will become reliant on other tools.
Once the baseline PBR texture is built it can then be imported into photoshop where the color channel can be exported as a normal map, which can then be modified into a height map. However, Unity’s height map utilization is not as prevalent as other software. In the URP height maps can only display a displacement of 0.08 at max, and as a result through testing I’ve found that height maps are effectively useless.
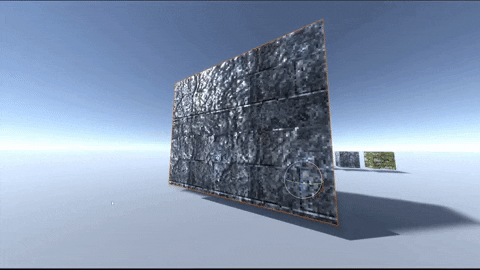
In the video above I exhibit an example material on a world space UV’d wall object. The material in question is a stone brick repeating pattern. Lighting is real time. To showcase the loss of detail, I’ll create the same material and render it without its normal map.

Here we can see that there is a significant difference in detail between the same material with and without its normal maps. There’s a significant different between a full and partial PBR material. Now we can compare the difference between a full and partial PBR material by adding in additional maps.
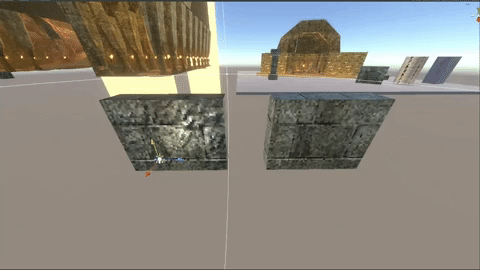
The key thing to look for in this example is the different in angular deformation of the faces. The left material has a height map on it generated from the normal map, which helps to create a sense of deeper geometry. It gives more context to the normal map and makes the shadows appear stronger and more defined. There’s more to it through rendering
Particle Low Res Texture Sheet Animations
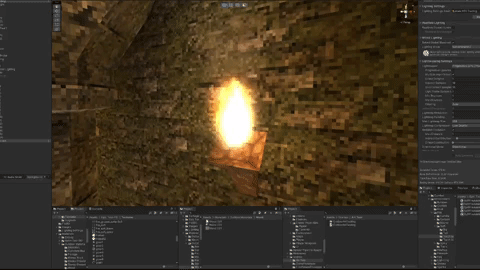
Thus far in Godwalker (as of 02/27/23) I have only done one low resolution texture sheet particle animation. These are the flaming torches you encounter throughout the levels. They are short-life particles which flicker and go out. They act as baked light sources as well. Their flame is an asset bought animation which has a de-res’d texture sheet, down to about 32x32. This intense low resolution definition allows the particle to stand out against the background, and create this very unique level of transparent edgework. Each particle begins its life moving upwards, shrinking, and looping the flaming texture animation. The sprite alternates between its different states at a varying speed, and once the particle reaches a size of zero it dies. There are about 30 particles emitted every second.
Exploring more low-res texture animations is going to be key as I build more complex attacks and patterns for the player to dodge. It is going to be essential to the art direction that these are polished up later. For now, I will focus on functionality, but once we are deeper into production I will consider more additions.
Soft Baked Lighting
Each level in Godwalker is one scene. These scenes are mostly static, with a few exceptions here and there. Their staticism is purposeful, as static objects in Unity can be light baked. This allows us to pre-render all visible light, and create far more detailed and interesting lighting in scenes without taking a performance hit. Realtime lighting is unfortunately not a very reliable or valuable way to light scenes. It is extremely costly, as it needs to be refreshed every single frame. By statically baking all of the lights in our scenes, we are able to build detailed environments with hundreds of stationary lights.
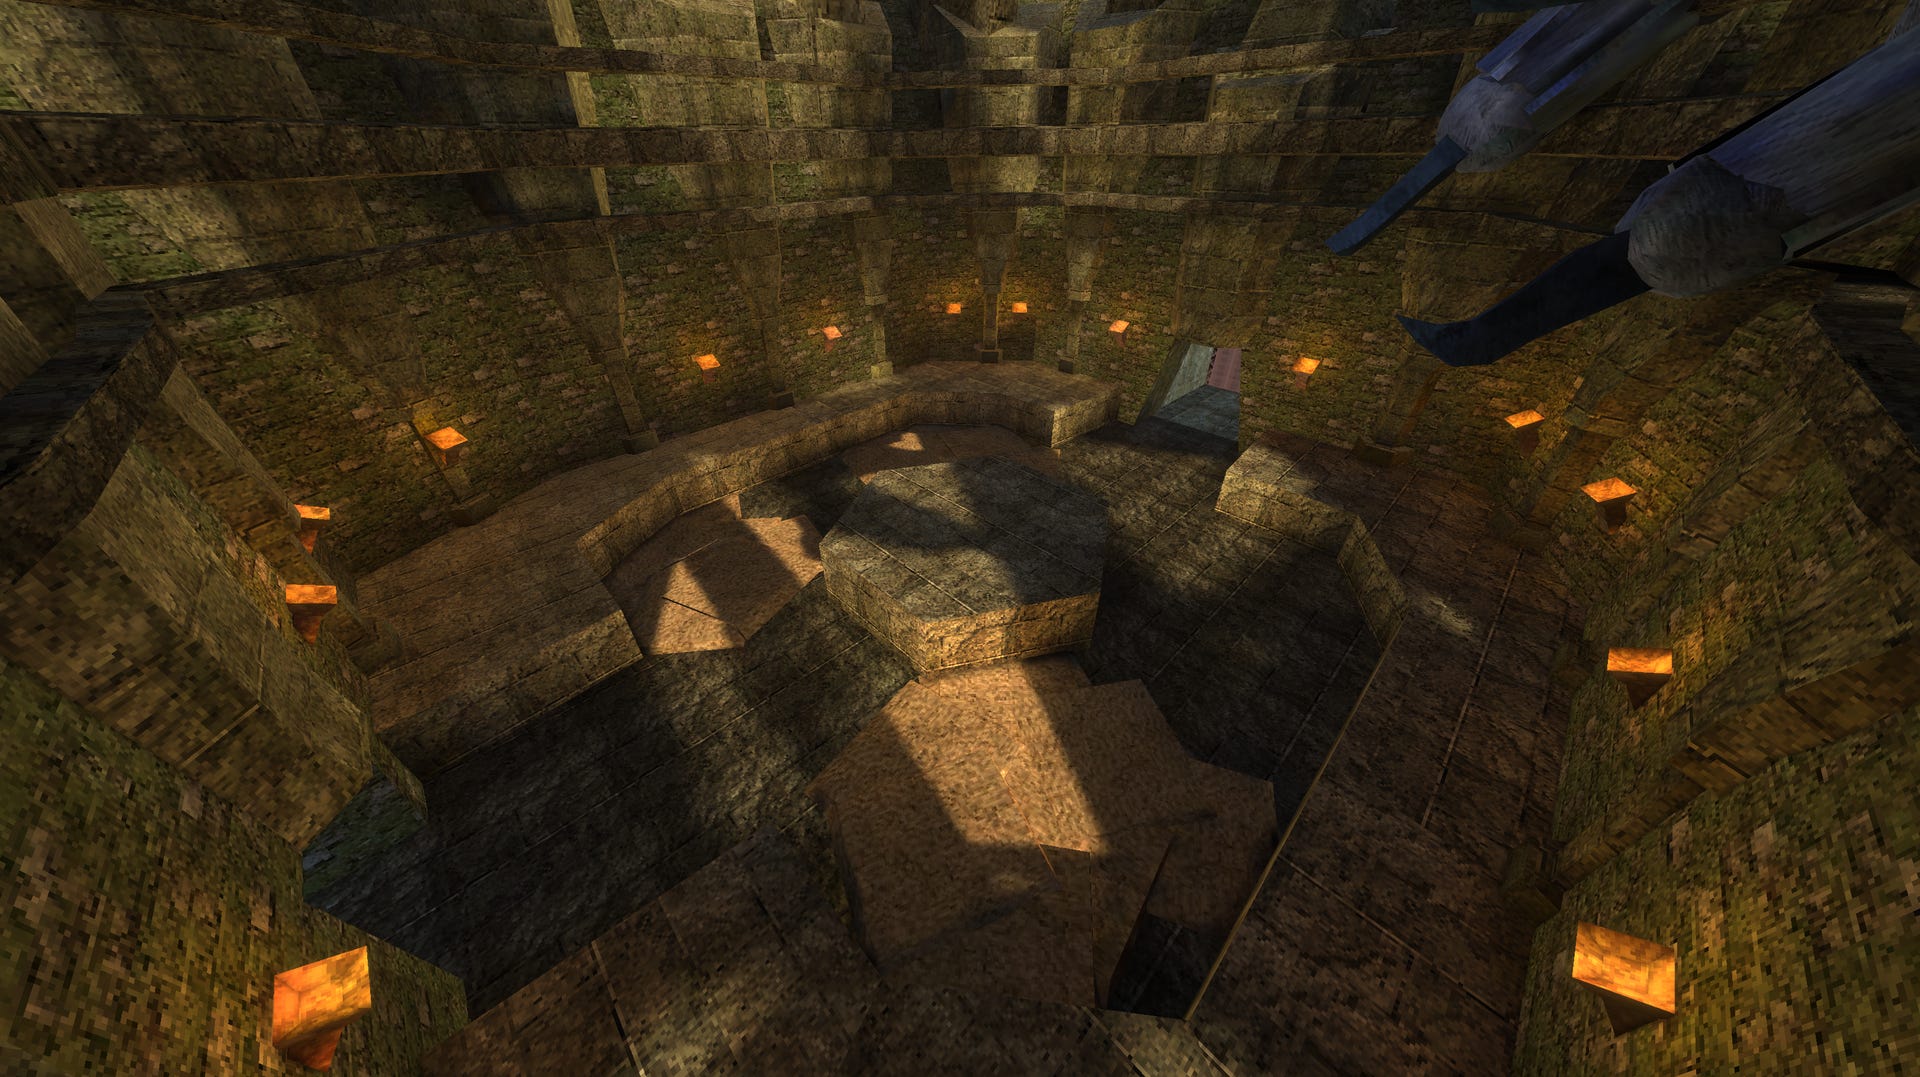
The softness and accuracy of these lights brings an intensely high level of quality to the game scene. Lighting in these scenes quite heavily supports the map design as well, as it allows me to control which parts of the level are highlights and which parts are darkened.
It grants the ability to designate both safe and hostile environment elements. By using this high quality lighting on simple assets, we can easily dictate to the player: “This is where I want you. This is dangerous. This is the combat field.” quickly and easily. But even more than that, it can allow us to dictate significance.
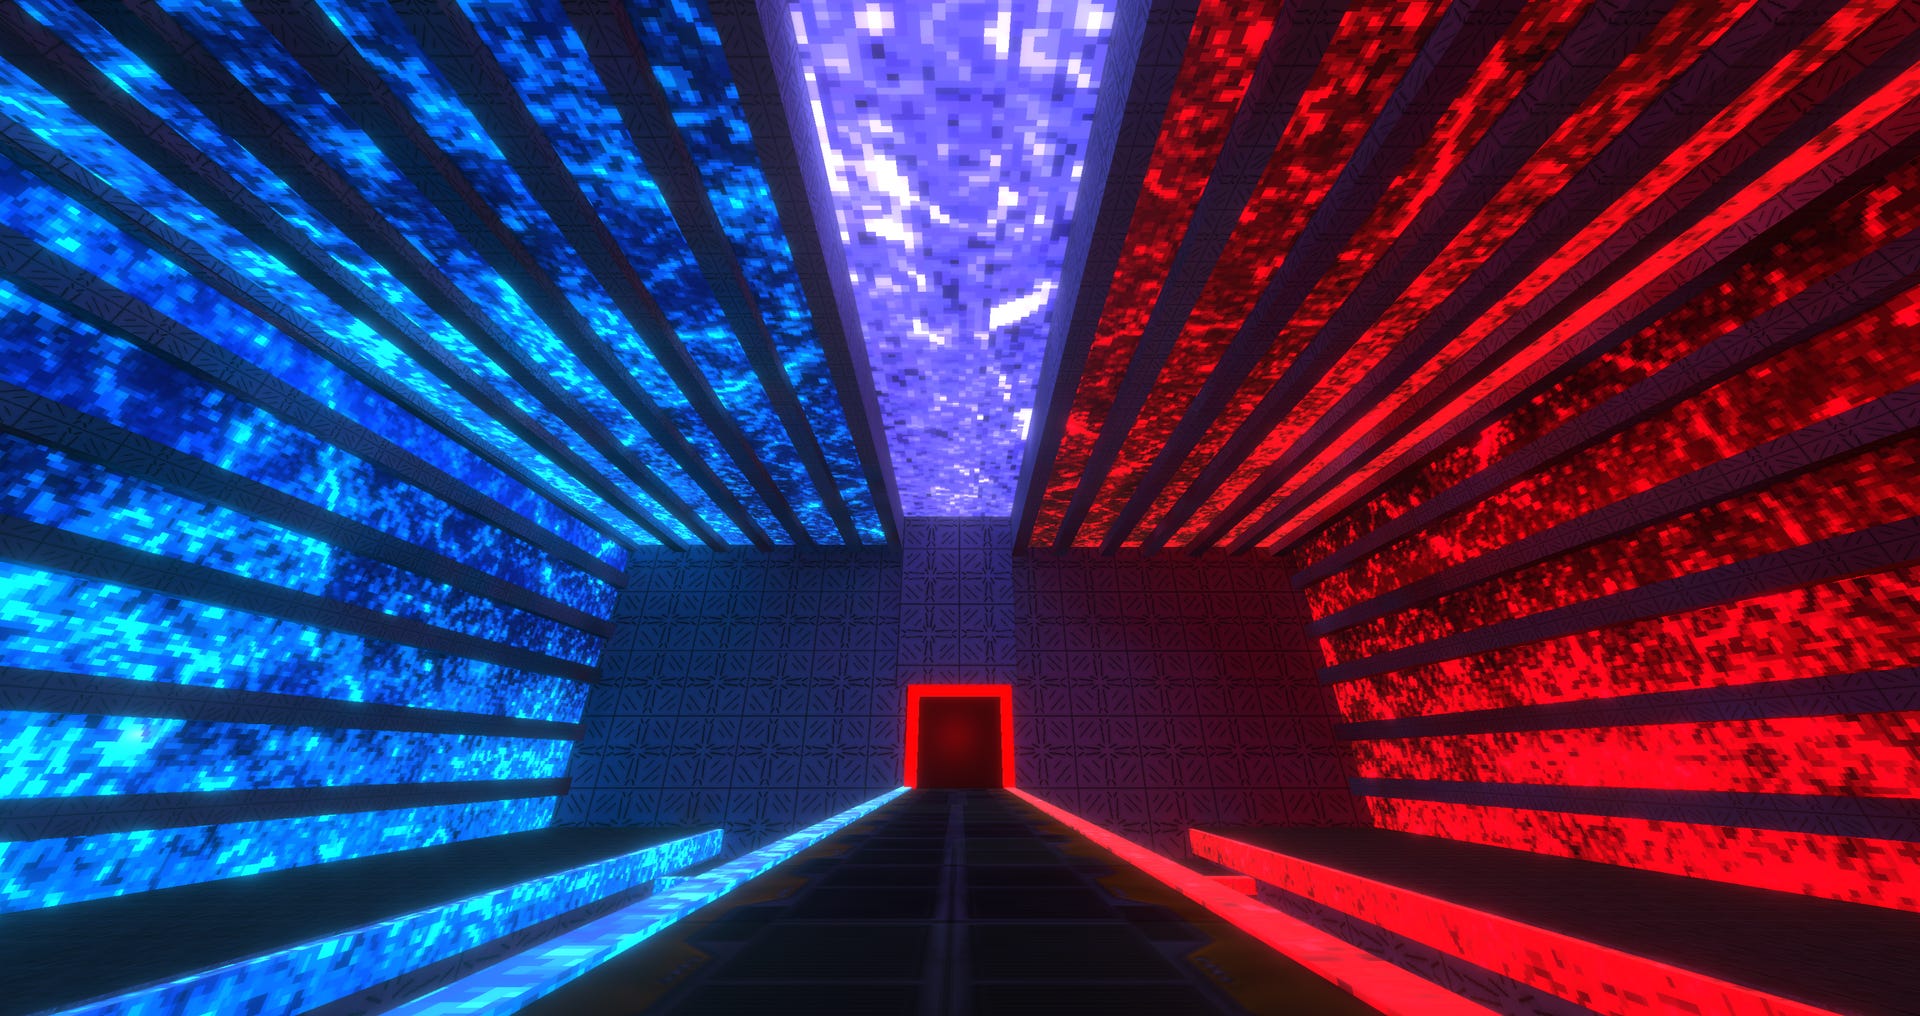
A strong lighting change in an environment can bring about a strong realization of significance to the player. This room looks familiar - but it is red. What could this mean? Is there something significant here? Not only that, but each door in the game is a bright white light which draws your eye. In the image above you can clearly see the exit, but it is not marked or designated. It is simply lit in a contrasting way to the rest of its environment.
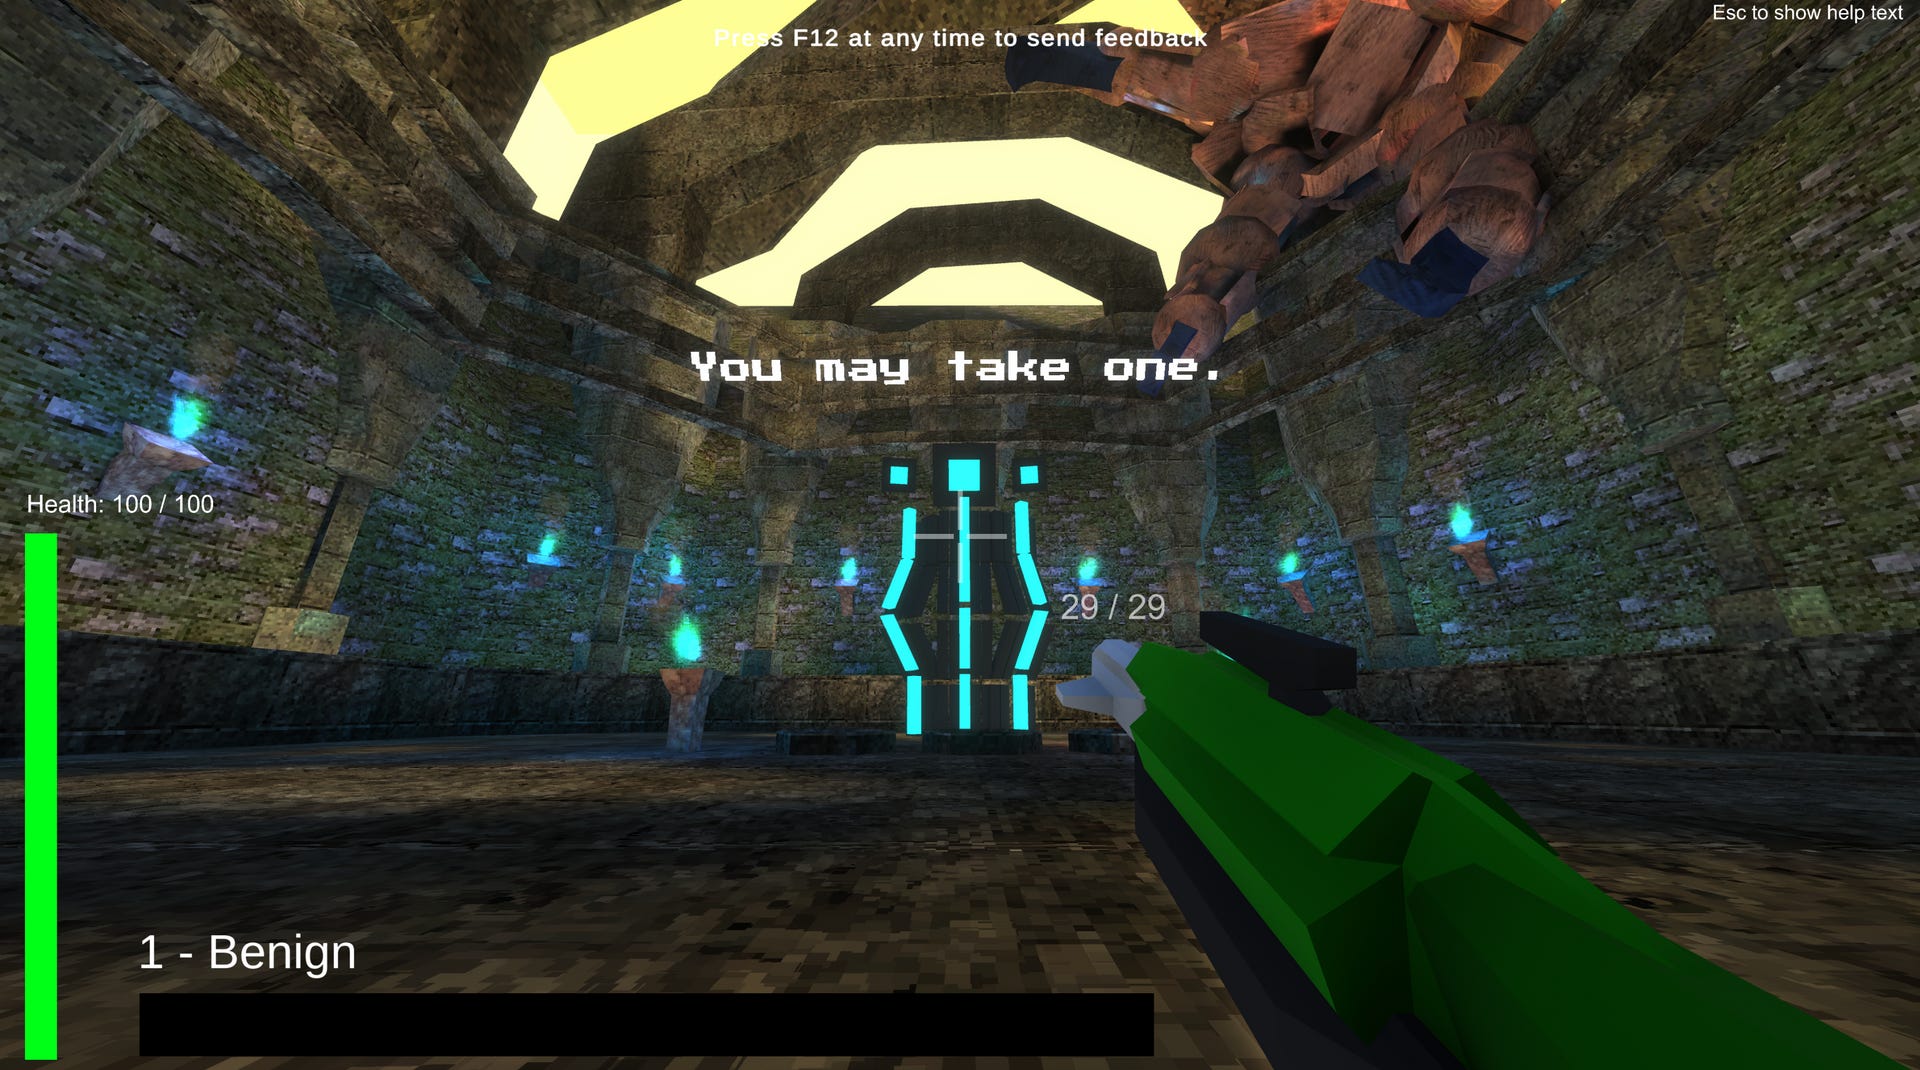
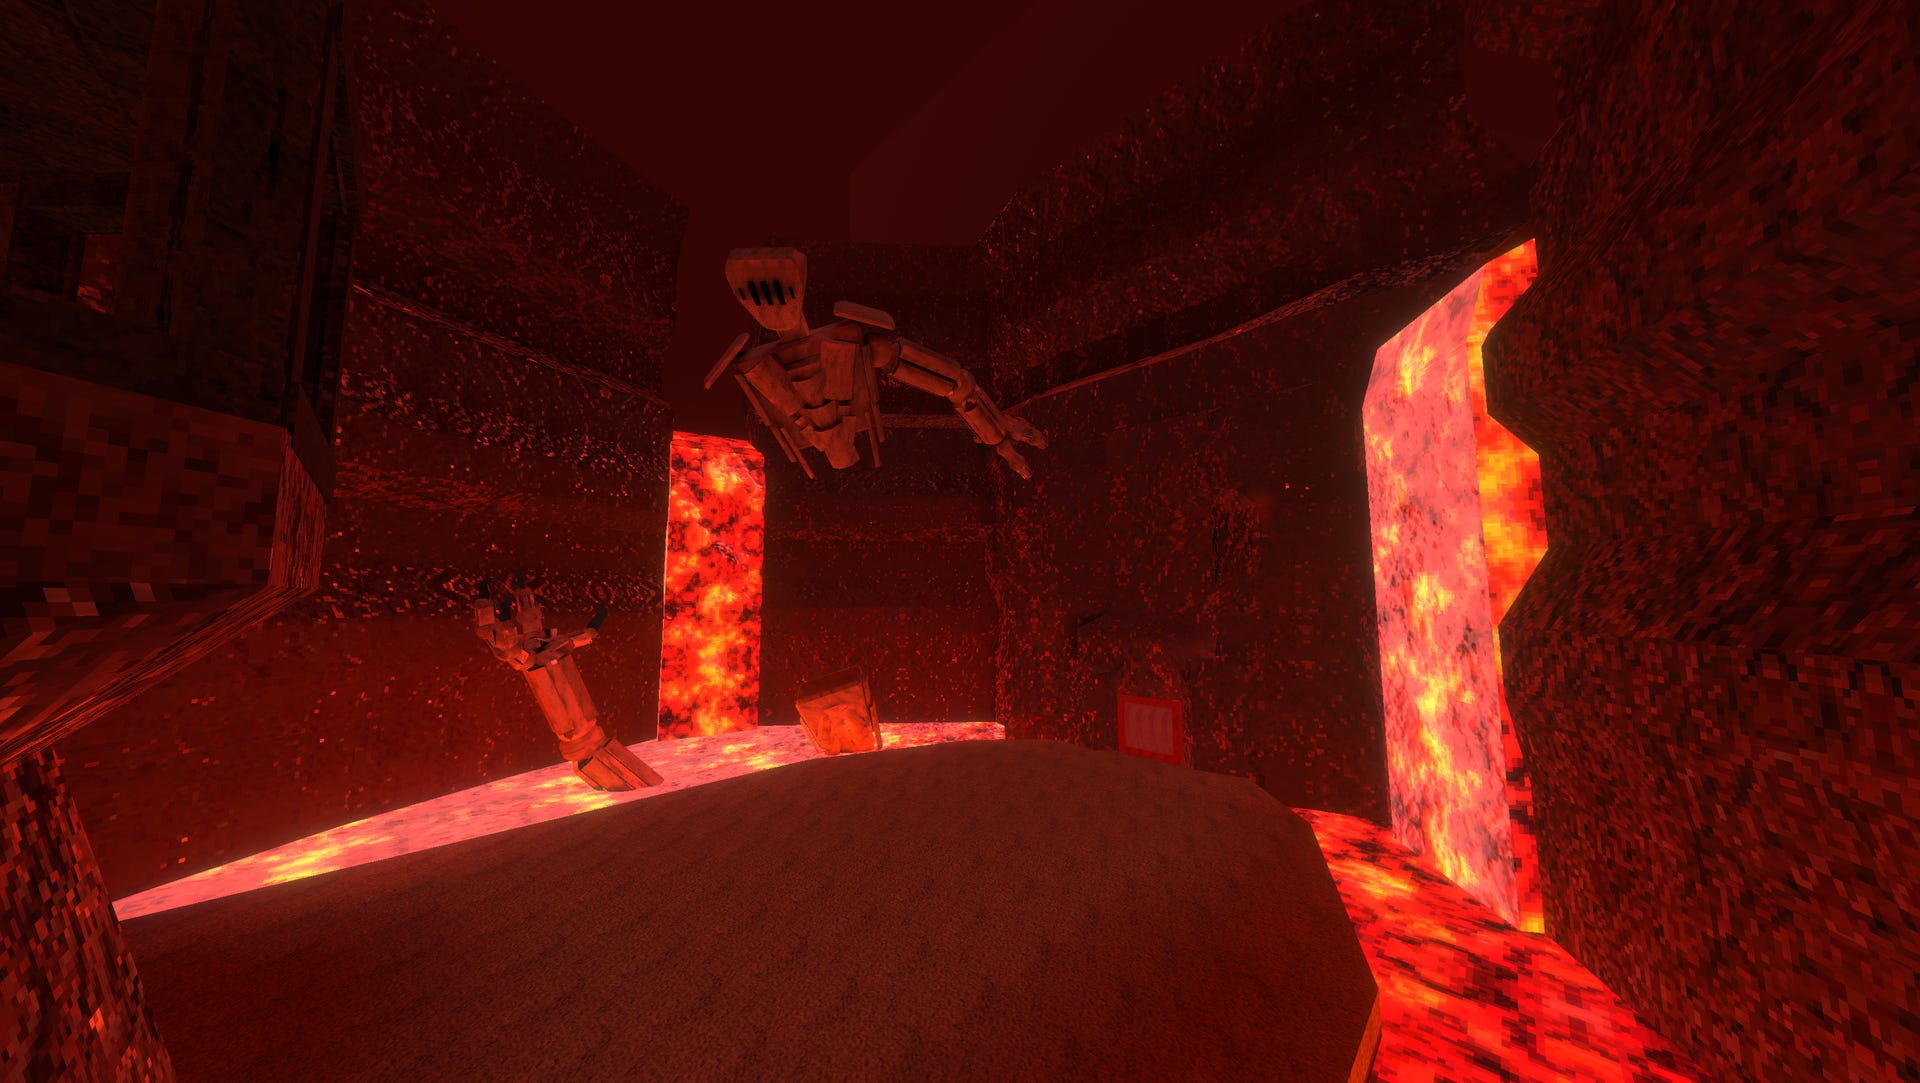
Even more subtle changes to rooms allow for quick recognitions of significance. In the screenshot above, the player is able to obtain a new weapon. This is an integral part to the game loop of Godwalker, but it is not an intensely significant moment. It is a momentary reward to keep the player moving forward. This is significant enough that it warrants a different kind of vibe - a slight blue within a familiar sky-lit scene. It just barely shakes up the pace and makes the scene the player walks into just a little more interesting. So far in playtesting, no player has tried to shoot the large three headed figure standing above the weapons.
Overall, the intensity of baked lighting is going to vary based on where the player is and what they are doing. The intensity of it in the game’s environment allows for designations and directives to be displayed quickly and easily. Lit environments draw our eyes to and from soft aspects. It creates more detail and interest in an otherwise simple environment of low resolution textures and shapes. Without it, blandness settles in.
Final Thoughts
This article is one of many aspects derived from my previous posting, Art Style Exploration in Godwalker. I plan on reviewing each aspect in more depth, covering lighting, texturing, and rendering. It is important to remember that using a rendering method like this, and setting these sorts of constraints, is all in the interest of reducing artistic labor and making it easier to produce refined assets.